Would you like to make your space feel both serene and functional by getting the lighting just right?
How do you balance artificial and natural lighting in Japandi design?
You’re aiming for a light scheme that supports the Japandi ethos: understated elegance, natural materials, and a sense of calm. This article walks you through the principles, measurements, fixtures, room-by-room tactics, and practical steps so you can create balanced lighting that respects both natural daylight and artificial sources.
Principles of Japandi lighting
Japandi lighting is guided by a mix of Japanese minimalism and Scandinavian warmth. You’ll prioritize simplicity, high-quality natural materials, and lighting that contributes to comfort and clarity without fuss.
Your lighting choices should feel purposeful and restrained, allowing your furnishings, textures, and architecture to shine. Think in layers—ambient, task, and accent—so each part of a room has the right amount of light for function and mood.
Simplicity and minimalism
You should choose fixtures with clean lines, simple forms, and an absence of visual clutter. Minimalism in lighting helps keep focus on natural textures like wood and woven materials.
Minimal fixtures also create visual calm, which is central to Japandi. Opt for pieces that are both sculptural and understated.
Natural materials and finishes
You’ll want fixtures that use wood, paper, ceramic, stone, and matte metal finishes. These materials harmonize with daylight and add tactile warmth.
Natural materials interact with light in pleasant ways—softening it and producing nuanced shadows that feel organic rather than harsh.
Warmth, comfort, and craftsmanship
Japandi combines Japanese wabi-sabi and Scandinavian hygge: imperfection, warmth, and a human scale. Lighting should enhance that comfort—soft, warm light that flatters skin tones and materials.
Choose handcrafted or artisan-feel fixtures where possible, and keep color temperatures and CRI (color rendering index) in mind to ensure warmth and fidelity.
Understanding natural light
Before selecting artificial light, you must understand how natural light behaves in your space. Natural daylight is dynamic—its direction, intensity, and color change by hour, season, and weather. You’ll use artificial light to complement and control this variability.
Assess where the light comes from, how it moves through the day, and where glare or deep shadows occur. This will help you plan layers of artificial lighting that fill in only when and where needed.
Assessing your site and windows
Look at window placement, size, orientation (north/south/east/west), and obstructions (trees, neighboring buildings). These factors determine how much direct or diffused daylight you receive.
Take notes across different times of day, using a simple journal or photos, so you can see when rooms need supplemental lighting versus when daylight does the job.
Light direction and quality
Direct sunlight creates strong highlights and shadows; diffused light is softer and more even. North-facing rooms often have cool, consistent light, while south and west-facing rooms receive warmer, intense light at times.
Match artificial light quality to the natural light you want to preserve. For example, in north-facing rooms, warmer artificial light can offset cool daylight and promote warmth.
Seasonal and daily changes
You should plan for shorter, dimmer winter days as well as bright summer afternoons. Artificial lighting should be flexible enough to replace daylight without feeling artificial or jarring.
Think in terms of scenes—morning routines, daytime work, evening relaxation—so your lighting supports different seasonal and daily needs.
Measuring natural light (lux and footcandles)
Use lux (lumens/m²) or footcandles to quantify light. Typical recommendations:
- General living spaces: 100–300 lux
- Kitchens and workspaces/task areas: 300–750 lux
- Reading/task lights: 300–500 lux localized
- Dining room (ambient): 150–300 lux
Table: Typical recommended lux levels for common tasks
| Space / Task | Recommended Lux |
|---|---|
| Hallways / circulation | 100–200 lux |
| Living room (ambient) | 100–300 lux |
| Dining room (ambient) | 150–300 lux |
| Kitchen (task) | 300–750 lux |
| Bathroom (vanity task) | 300–500 lux |
| Reading / close tasks | 300–500 lux |
| Home office / detailed work | 500–1000 lux |
You can use a light meter app or handheld lux meter to measure actual light levels to inform your artificial lighting strategy.
Role of artificial light in Japandi
Artificial lighting should never compete with natural light; instead, it should complement and enhance it. You’ll think in layers to achieve balance: ambient (general), task (functional), and accent (visual interest).
Artificial lighting in Japandi emphasizes warm tones, subtle shadows, and fixtures that feel tactile and integrated with furniture and architecture.
Ambient lighting
Ambient lighting provides the base level of illumination. It should be gentle and even to maintain a calm atmosphere—for example, recessed fixtures with warm LEDs or paper lantern-style pendants.
You should avoid overly bright, cold ambient light that disrupts the cozy Japandi mood.
Task lighting
Task lighting is focused illumination for activities—cooking, reading, working. Use directional fixtures such as pendant lights over a kitchen island, adjustable desk lamps, or under-cabinet LEDs.
Task lighting should be higher in lux than ambient lighting and placed carefully to avoid glare and shadows.
Accent and decorative lighting
Accent lighting highlights art, architectural features, or textured surfaces. Small wall washers, picture lights, or discreet spotlights create depth and visual interest.
Keep accents minimal and purposeful to maintain Japandi’s restrained aesthetic.
Layering light
You’ll blend ambient, task, and accent lighting so the room reads well at any time of day. Layers allow you to create multiple scenes—bright for tasks, softer for relaxation—without having to rely on a single overpowering source.
Use dimmers and multiple circuits to manage these layers effectively.
Color temperature and CRI
Color temperature (measured in Kelvin) and CRI affect how colors and materials appear. For Japandi, you’ll typically favor warm, natural tones and high color fidelity.
- Ambient light: 2700K–3000K for warmth and comfort.
- Task light: 3000K–3500K for clearer visibility without becoming clinical.
- Accent light: 2700K–3000K to maintain warmth while showcasing materials.
Aim for a CRI of 90 or higher so natural wood tones, fabrics, and finishes render accurately and beautifully.
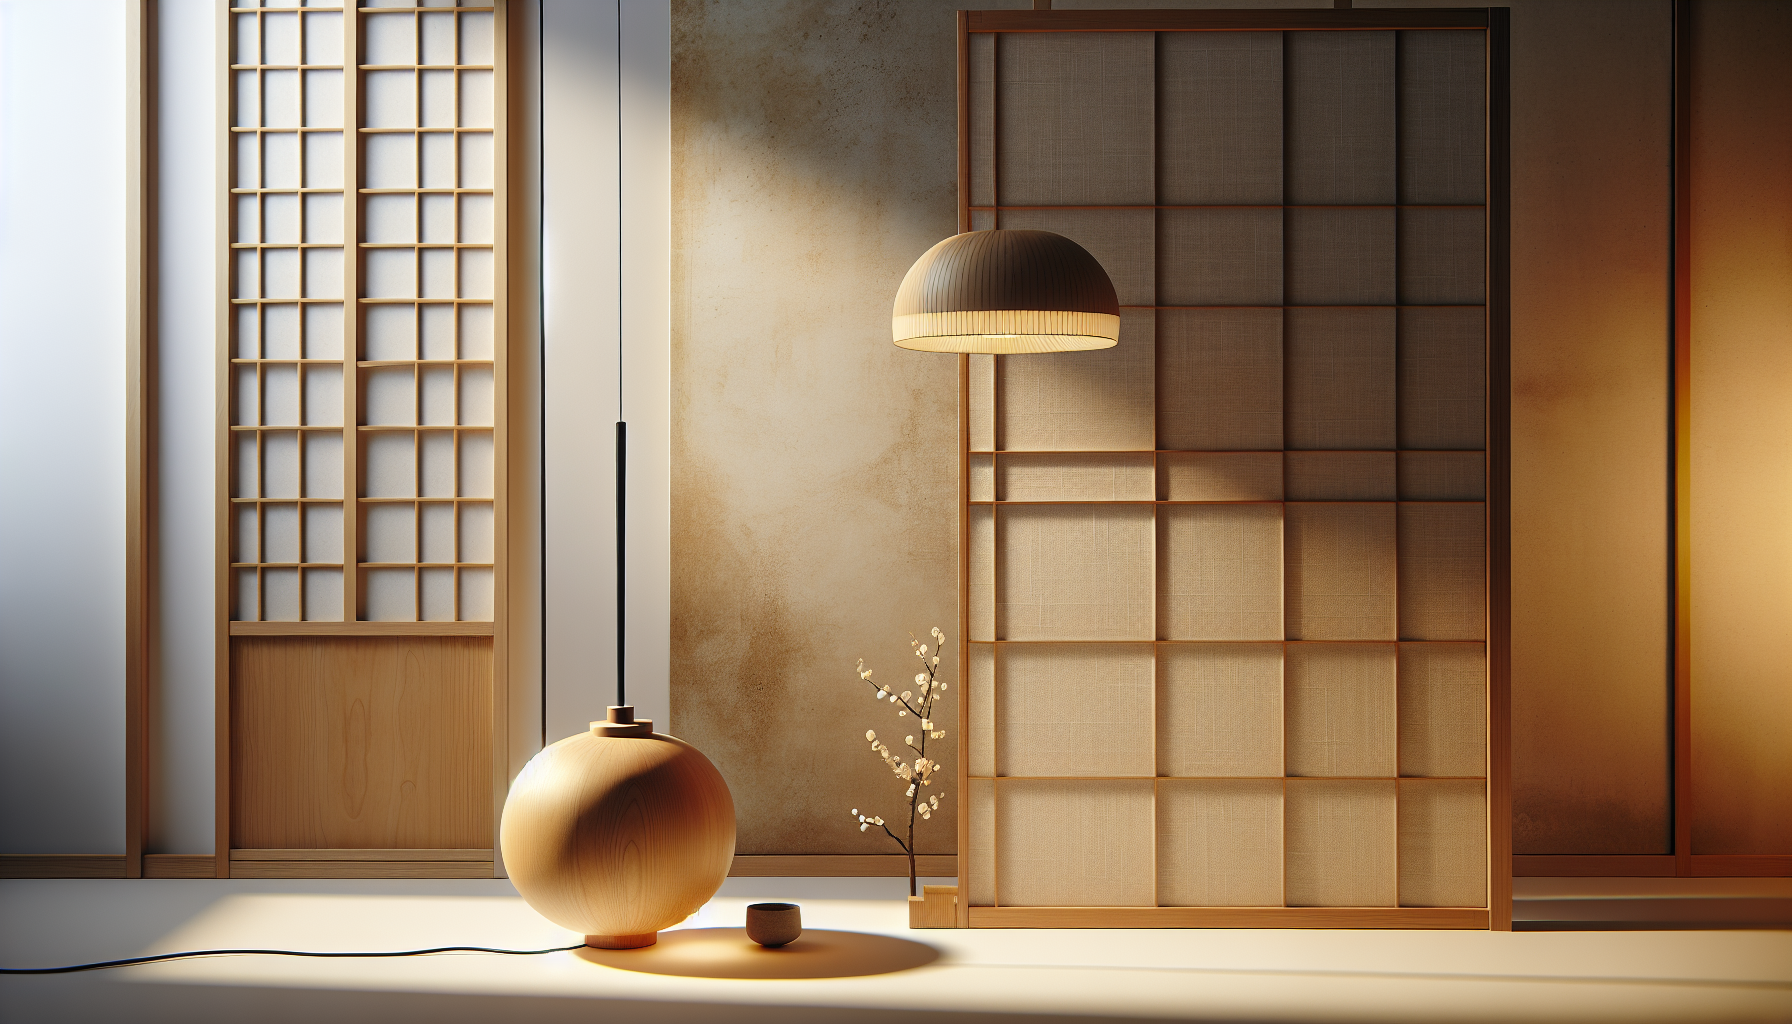
Light fixtures and materials suitable for Japandi
Choose fixtures that feel organic and timeless. Materials like rice paper, linen, matte ceramic, untreated or oiled wood, and metal with soft finishes suit the look.
Table: Fixtures by type, purpose, and Japandi-friendly materials
| Fixture Type | Typical Use | Japandi Material/Style Suggestions |
|---|---|---|
| Pendant | Ambient or over dining table | Paper/rice-paper, rattan, simple ceramic shades, slender wood accents |
| Floor lamp | Ambient or task | Linen/cloth shades, wood tripod bases, matte metal accents |
| Table lamp | Task, accent | Ceramic, textured clay bases, fabric shades, low-profile forms |
| Wall sconce | Accent/ambient | Minimal metal sconces, wood backplate, paper shades |
| Recessed/Downlight | Ambient | Warm LEDs with trim in matte finishes, used sparingly |
| Track lighting | Accent/task | Low-profile track, adjustable heads, neutral finishes |
| Under-cabinet strip | Task | Discreet warm LED strips, frosted diffusers |
| Lantern / Shoji-style | Ambient | Rice paper or linen, birch or oak frames |
Stick to neutral finishes—soft black, warm brass, natural wood, and matte white—that complement materials used in furniture and textiles.
Choosing shapes and proportions
Favor low, elongated pendant shapes or soft spherical forms that echo Japanese lanterns and Scandinavian simplicity. Keep fixture sizes proportional to furniture and ceiling height—oversized fixtures can overwhelm minimal spaces.
Design strategies to balance artificial and natural light
Balancing lighting is about responding to your space, daylight availability, and how you use each room. Use these strategies to create harmony between artificial and natural light.
Maximize daylight thoughtfully
Position seating and frequently used areas to benefit from daylight, but avoid placing screens or work surfaces where direct glare hits. Use reflective surfaces thoughtfully to spread daylight deeper into a room.
If you have large windows, let daylight be the primary light source during the day and plan artificial lights to support evening and overcast days.
Soften and diffuse daylight
Use sheer curtains, shoji screens, or translucent shades to soften direct sunlight. This reduces harsh shadows and maintains even light that works well with Japandi materials and tones.
Diffusion helps reduce the contrast between bright and dark areas, making artificial light transitions more natural.
Control and zoning
Create lighting zones—separate circuits for ambient, task, and accent—so you only use what you need. This conserves energy and supports different activities while preserving the room’s calm.
Use switches, dimmers, and smart scenes to select zones easily.
Dimming and fine-tuned control
Dimmers are essential. They let you adjust light intensity to match daylight levels and activities. You should choose dimmers compatible with LED drivers and retrofits.
Dimming also helps maintain warm color perception because lower intensities often feel cozier.
Use reflectance and surfaces
Lighter walls and ceilings reflect daylight and reduce the need for harsh artificial light. But Japandi tends to use muted tones and natural wood—balance is key. You can use lighter plaster or pale textiles strategically to increase reflectance without compromising the aesthetic.
Matte surfaces reduce glare; glossy surfaces increase shine and reflections—choose according to the effect you want.
Accent and focal points
Use subtle accent lighting to highlight natural textures—wood grains, woven baskets, ceramics. The accents should be understated, creating visual depth without competing with daylight.
Accent lighting can be used more prominently in the evening to create sculptural shadows and highlight craft.
Integrate lighting into architecture and furniture
Consider built-in shelving with concealed LED strips, integrated uplights near ceilings, or pendants hung from structural beams. This makes lighting feel like part of the room’s architecture rather than an afterthought.
Integration is a hallmark of mature Japandi lighting schemes.
Room-by-room guidance
Different rooms have different daylight access and functions. The following guidance helps you tailor your lighting strategy for key spaces.
Living room
Your living room should feel warm and layered. During the day, prioritize seating near windows and use sheer treatments to soften daylight. For artificial lighting, combine a warm central pendant or recessed ambient with floor lamps for reading and small accent lights to highlight texture.
Aim for ambient levels around 100–300 lux and local task lighting around 300–500 lux for reading areas.
Suggested fixtures:
- Low-profile pendant or lantern above central area
- Floor lamp with adjustable head near seating
- Wall washers for art or shelving
Kitchen
Kitchens need strong task lighting balanced with pleasant ambient light. Maximize daylight at prep zones and use under-cabinet LED strips or hidden profiles for countertop illumination. Over islands, use focused pendants that also act as visual anchors.
Aim for 300–750 lux for work surfaces. Use 3000–3500K for task areas to ensure clarity.
Suggested fixtures:
- Warm recessed ambient lighting on a dimmer
- Under-cabinet strips with frosted diffusers
- Pendant lights over island with wood or ceramic details
Dining room
Your dining area should feel cozy and inviting. A single low-hung pendant with a dimmer over the table establishes focus and warmth. During daylight hours, natural light will take precedence; in the evening, dampen surrounding lights to concentrate attention on the table.
Aim for ambient 150–300 lux; the pendant should create a brighter pool over the table while keeping surrounding areas softer.
Suggested fixtures:
- Center pendant (paper, ceramic, or woven material)
- Wall sconces for ambient fill
- Dimmable circuit for flexibility
Bedroom
Bedrooms should be tranquil and flexible. Maximize soft daylight for mornings, but ensure privacy with layered window treatments. Use warm ambient lighting and targeted bedside task lamps for reading. Accent lighting can highlight a headboard or a favorite object.
Aim for ambient 100–200 lux, bedside reading 300–500 lux localized.
Suggested fixtures:
- Warm ambient pendant or recessed lights on dimmer
- Bedside lamps with warm 2700K–3000K light
- Subtle shelf lighting for soft accents
Bathroom
Bathrooms need good task lighting for grooming and softer ambient light for relaxation. Place vanity lights to reduce shadows on the face—vertical fixtures at each side or an evenly diffused light above the mirror. Use fixtures rated for damp locations.
Aim for vanity task 300–500 lux and ambient 150–300 lux.
Suggested fixtures:
- Vertical sconces or LED mirrors with even light
- Ceiling-mounted ambient on dimmer
- Subtle shower lighting with IP-rated fixtures
Entryway / Hallway
These spaces set the tone. Use soft ambient light and a focal pendant or minimalist sconce to create an inviting path. Let daylight from adjacent rooms brighten corridors when available.
Aim for 100–200 lux for circulation and slightly more for areas where you put on shoes or check a mirror.
Suggested fixtures:
- Small pendant or lantern
- Wall sconces for even glow
- Motion-sensor dimming for convenience
Calculating lighting needs
A simple formula helps convert target lux into required lumens:
Required lumens = Room area (m²) × Target lux × Room usage factor
For most residential situations, you can use a utilization factor of 0.6–0.8 for typical fixtures and reflectance. Another simpler approach:
Total lumens needed = Room area (m²) × Desired lux
Example calculation:
You have a living room 5m × 4m = 20 m². You want 150 lux ambient. Total lumens = 20 m² × 150 lux = 3000 lumens.
If you plan three ceiling fixtures, each should provide about 1000 lumens (before dimming and fixtures’ diffusers reduce output).
Table: Example lumen outputs for common LEDs
| LED Type | Typical Lumen Output |
|---|---|
| Small decorative bulb | 400–700 lm |
| Standard A19 LED | 800–1100 lm |
| High-output LED downlight | 1000–2000 lm |
| LED linear strip (per meter) | 300–1000 lm depending on density |
Remember to allow for fixture efficiency (diffusers cut usable light) and other losses. If in doubt, specify higher lumens with dimming capability.
Window treatments and daylight control
Window treatments in Japandi should be natural, tactile, and functional. Your goal is to control glare and privacy while preserving the softness and warmth of daylight.
Options:
- Sheer linen curtains: diffuse sunlight gently while retaining a soft aesthetic.
- Shoji screens: traditional Japanese rice-paper screens that provide diffusion and privacy.
- Roller shades with a translucent option: clean look, easy to operate.
- Woven bamboo or grasscloth shades: natural texture and moderate light control.
- Layering: combine sheer with heavier curtains for flexibility.
Choose neutral tones and natural fibers to stay consistent with Japandi design.
Smart controls, dimming, and tunable lighting
Smart controls let you fine-tune light levels to match daylight, activities, and circadian rhythms. Use timers, scenes, or sensors to make lighting intuitive.
Consider tunable white (CCT adjustable) systems that let you shift color temperature through the day—cooler whites for morning tasks and warmer whites for evening relaxation. Keep tunable white subtle and avoid abrupt color shifts that feel artificial.
Motion sensors and daylight-harvesting sensors save energy and ensure lights operate only when needed.
Materials, finishes, and color palette that affect lighting
Your surfaces influence how light behaves. Wood, plaster, stone, textiles, and matte paint absorb and scatter light differently.
- Light-colored plaster or lime-wash: increases reflectance without glare.
- Medium-tone wood: absorbs some light and adds warmth.
- Matte finishes: reduce reflections and keep light soft.
- Metallic accents: use sparingly to catch light and create subtle highlights.
Consider sample boards and test patches to see how materials look under different lighting conditions.
Sustainability and energy efficiency
LEDs are essential for efficient, long-lasting lighting. Choose ENERGY STAR-rated fixtures and bulbs with high efficacy (lumens per watt) and long rated lifespans.
Daylight harvesting (using sensors to dim artificial light as daylight increases) can significantly reduce energy use. Use timers, occupancy sensors, and programmable scenes to limit unnecessary lighting.
Selecting durable materials and fixtures that can be repaired preserves resources and fits the Japandi philosophy of longevity.
Maintenance and longevity
Plan for maintenance so your design stays beautiful. Use dust-free zones for delicate paper shades and ensure accessible bulb replacement for recessed fixtures. Choose finishes that tolerate occasional cleaning.
Invest in quality LED drivers and dimmers, and keep control systems updated to prevent flicker and compatibility issues.
Common mistakes to avoid
- Relying on a single overhead light: This flattens the space and eliminates the layered warmth you want.
- Choosing lights with low CRI: Colors and materials will look dull and less natural.
- Over-lighting during the evening: Too bright, cool light destroys the cozy Japandi mood.
- Ignoring window function: Blocking all daylight defeats the purpose of blending nature with design.
- Oversized or flashy fixtures: Japandi favors calm, proportionate choices.
Avoiding these pitfalls will keep your lighting authentic and effective.
Final checklist and quick tips
Use this checklist when planning or updating lighting so you don’t miss key steps.
Table: Japandi lighting planning checklist
| Step | Action |
|---|---|
| Site assessment | Record window orientation, daylight patterns, and glare issues |
| Layers | Plan ambient, task, and accent lighting for each space |
| Color temp & CRI | Choose 2700–3000K for ambient, 3000–3500K for tasks; CRI ≥ 90 |
| Controls | Include dimmers and separate circuits for flexibility |
| Materials | Select natural materials (paper, wood, ceramic) for fixtures |
| Fixtures | Keep shapes minimal and proportionate to space |
| Lux calculation | Compute lumens needed by room area × target lux |
| Window treatments | Use sheers or shoji for diffusion, layers for privacy |
| Sustainability | Use efficient LEDs and sensors to reduce energy use |
| Maintenance | Ensure accessibility for bulb/driver replacement and cleaning |
Quick tips:
- Start with daylight: let it guide where you place seating and key functions.
- Think “less but better”: choose a few well-made fixtures rather than many decorative pieces.
- Test at night: always check your artificial lighting plan after sunset to ensure mood and function.
- Use materials to buffer light: rugs, throws, and textured walls soften light and create depth.
Conclusion
You’re creating a lighting scheme that bridges the outdoors and the built environment with restraint and warmth. By understanding daylight patterns, layering artificial light, choosing warm color temperatures and high-CRI sources, and selecting fixtures made from natural materials, you’ll achieve the quiet, functional beauty characteristic of Japandi design. Use dimmers and smart controls to adapt across seasons and times of day, and always prioritize quality, proportion, and subtlety.
If you want, you can tell me about a specific room (dimensions, windows, current fixtures), and I’ll help calculate lumens, suggest fixture types, and propose a lighting layout tailored to your space.