What are some DIY Japandi furniture projects that can enhance the aesthetic of your home? If you’ve been admiring the seamless blend of Japanese minimalism and Scandinavian functionality, you’re likely intrigued by Japandi design. This style embraces tranquility, natural materials, and clean lines that create a serene living space. In this article, you’ll discover some exciting DIY Japandi furniture projects that you can bring to life in your own home.
Understanding Japandi Design
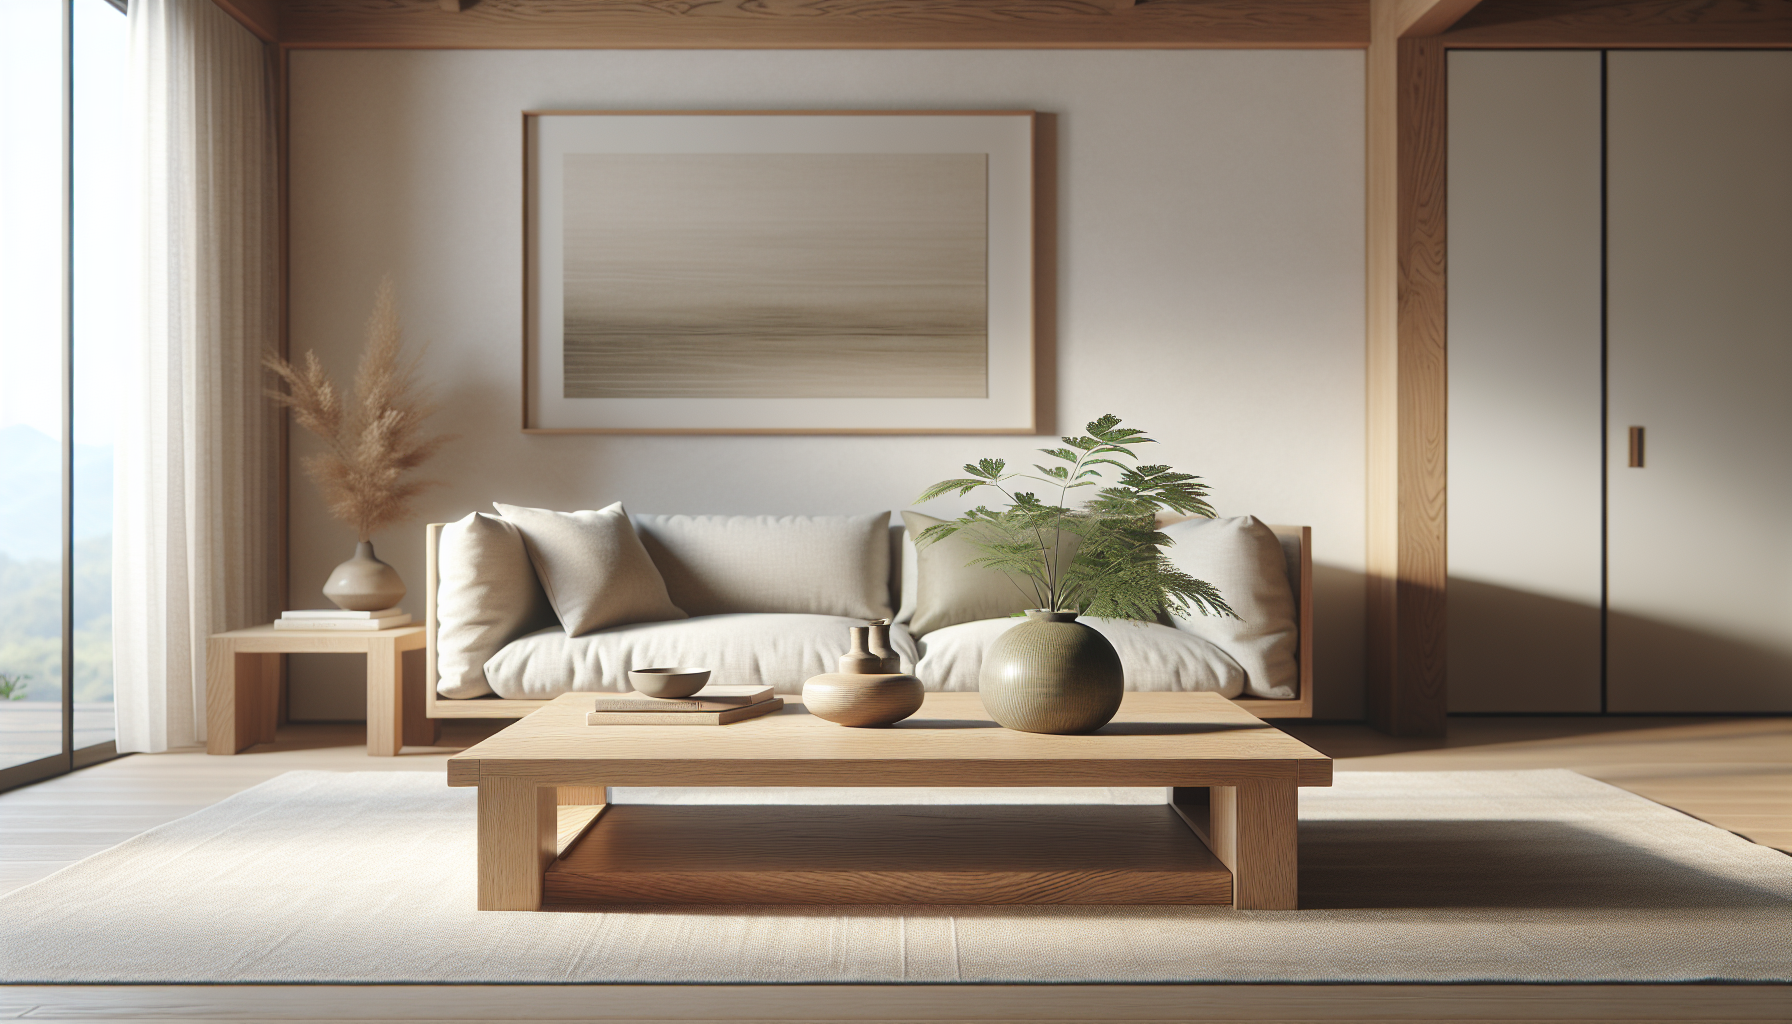
Embracing a style requires a good grasp of its core principles. Japandi design is all about merging two distinct cultures: the simplicity and elegance of Japanese design with the warmth and functionality of Scandinavian decor.
Key Characteristics of Japandi Design
To capture the essence of Japandi in your furniture projects, it’s important to understand the main characteristics:
-
Minimalism: Keeping things simple and uncluttered helps promote a sense of calm.
-
Natural Materials: Wood, bamboo, and stone are commonly used, celebrating the beauty of nature.
-
Neutral Color Palette: Soft and muted colors support a restful atmosphere. Think taupe, muted greens, and subtle blues.
By focusing on these elements, you’ll be able to create furniture that embodies the spirit of Japandi while maintaining a personal touch.
DIY Japandi Furniture Projects
Now that you have a better understanding of Japandi design, let’s look at some simple DIY furniture projects that you can tackle. Each of these projects can serve as a functional piece while contributing to the aesthetic appeal of your home.
1. Japandi Coffee Table
A coffee table can be the centerpoint of your living room. Creating a Japandi-style coffee table involves blending functionality with a minimal aesthetic.
Materials Needed:
- Oak or walnut wood boards
- Wood glue
- Sandpaper
- Wood finish or stain (optional)
- Four tapered legs (you can buy these or create your own)
Steps:
-
Design Your Table: Decide on a rectangular or circular shape. Keep the edges clean and sharp to maintain that minimal look.
-
Cut the Wood: Measure and cut the wood to your desired dimensions.
-
Assemble the Tabletop: Use wood glue to assemble your tabletop, clamping it until it dries.
-
Attach the Legs: Secure the tapered legs to the corners of your table.
-
Finish: Sand the surfaces for a smooth finish. If you want, apply a wood stain or clear coat to enhance the natural grain of the wood.
2. Minimalist Bookshelf
A bookshelf can be more than just a storage space; it can be a statement piece in your home. Creating a Japandi-style bookshelf involves designing a piece that is both functional and visually pleasing.
Materials Needed:
- Plywood board (thickness of your choice)
- Wood dowels or brackets (for support)
- Wood stain or sealant (optional)
- Sandpaper
Steps:
-
Plan Your Design: Determine how many shelves you need and the height between each.
-
Cut the Plywood: Cut the plywood to create the shelves and side panels.
-
Assemble the Bookshelf: Attach the side panels to the shelves using wood dowels or brackets for stability.
-
Sand and Finish: Smooth the edges and surfaces before applying a finish if desired.
3. Scandinavian-Style Bench
A bench is a versatile piece of furniture that can be placed anywhere. Making a Japandi-inspired bench will give you extra seating while adding elegance to your space.
Materials Needed:
- Thick wooden planks for the seat
- Thin wooden planks for the sides
- Wood screws
- Sandpaper
- Hammy legs (or create your own legs)
Steps:
-
Design Your Bench: Decide the length and height for comfortable seating.
-
Cut the Wood: Cut the wooden planks to match your design specifications.
-
Assemble the Bench: Use screws to attach the sides to the seat.
-
Prepare for Finishing: Sand the wooden surfaces until it’s smooth.
-
Finishing Touches: Apply a protective seal or stain to enhance the natural beauty.
4. Japandi Side Table
Every living space could use a side table, and building one that reflects the Japandi style is not as complicated as it may seem.
Materials Needed:
- A small, thick wooden top
- Four wooden legs (or you can repurpose old table legs)
- Wood glue or screws
- Sandpaper
Steps:
-
Choose a Design: Determine the height and width based on your existing furniture.
-
Cut Wood Pieces: Shape the tabletop and the legs.
-
Assemble: Secure the legs to the tabletop using wood glue or screws.
-
Finish: Sand down for a smooth surface, then consider staining to enhance the wood grain.
5. Japandi Bed Frame
Creating a bed frame in the Japandi style can transform your bedroom into a tranquil retreat.
Materials Needed:
- Wooden boards for the frame and slats
- Screws or fasteners
- Sandpaper
- Optional: finishing oil or paint
Steps:
-
Design: Sketch out both the headboard and the frame dimensions that suit your mattress.
-
Cut the Wood: Follow your design to cut the necessary pieces.
-
Assemble the Frame: Securely attach the side and end panels along with slats for support.
-
Headboard: Assemble and attach the headboard if you choose one.
-
Finish: Sand and apply your desired finish to protect the wood.
6. Japandi Dining Table
A dining table is often the centerpiece in your home, where family and friends gather. Making a DIY Japandi dining table can be very rewarding.
Materials Needed:
- Solid wood panels for the tabletop
- Strong table legs or a base
- Screws and wood glue
- Sandpaper
- Clear finish or paint
Steps:
-
Select a Design: Decide on the shape and size suitable for your space and dining needs.
-
Cut the Wood: Shape your tabletop and legs.
-
Assemble the Table: Secure the table legs to the underside of the tabletop.
-
Sand and Finish: Sand it to a smooth finish and apply anything necessary to protect the wood.
Conclusion
Embracing the Japandi style in your home doesn’t require hiring professionals or spending a fortune. With these DIY furniture projects, you can bring the soothing and elegant aesthetics of Japandi directly into your living spaces. By choosing natural materials, simple shapes, and an overall minimalist approach, you’ll find that ordinary furniture can be transformed into beautiful, functional works of art. Happy building!