Have you ever thought about how transforming your walls can enhance the overall vibe of your living space? Japandi-style, a beautiful blend of Japanese minimalism and Scandinavian coziness, emphasizes clean lines, natural materials, and simplicity. Creating your own wall art in this style can not only personalize your space but also bring a touch of tranquility and balance.
Understanding Japandi Style
The Japandi style is all about harmony. It takes inspiration from two distinct cultures—Japan’s Zen philosophy and the sleek functionality of Scandinavian design. This aesthetic is characterized by a muted color palette, organic shapes, and an emphasis on craftsmanship. When you embrace Japandi style, your home becomes a serene retreat filled with thoughtful design choices.
Key Features of Japandi Style
- Minimalism: Less is more. The focus is on essential elements that serve a purpose.
- Natural Materials: Wood, bamboo, clay, and textiles are commonly used for a tactile experience.
- Neutral Color Palette: Soft hues like warm beiges, whites, and gentle greys create a calming atmosphere.
- Functional Decor: Each piece of decor should be both beautiful and practical.
By understanding these key features, you can more easily create wall art that reflects the essence of Japandi style.
The Importance of Wall Art
Wall art has a significant impact on the feel of a room. It provides personality and can act as a focal point. In the context of Japandi style, wall art should feel harmonious and blend seamlessly with the rest of your decor. Let’s look at some Japandi-style DIY wall art ideas that you can easily create yourself.
Japandi-inspired DIY Wall Art Ideas
Creating wall art in the Japandi style can be fun and rewarding, allowing you to infuse your personal touch into your space. Below you’ll find various DIY projects that embody this aesthetic.
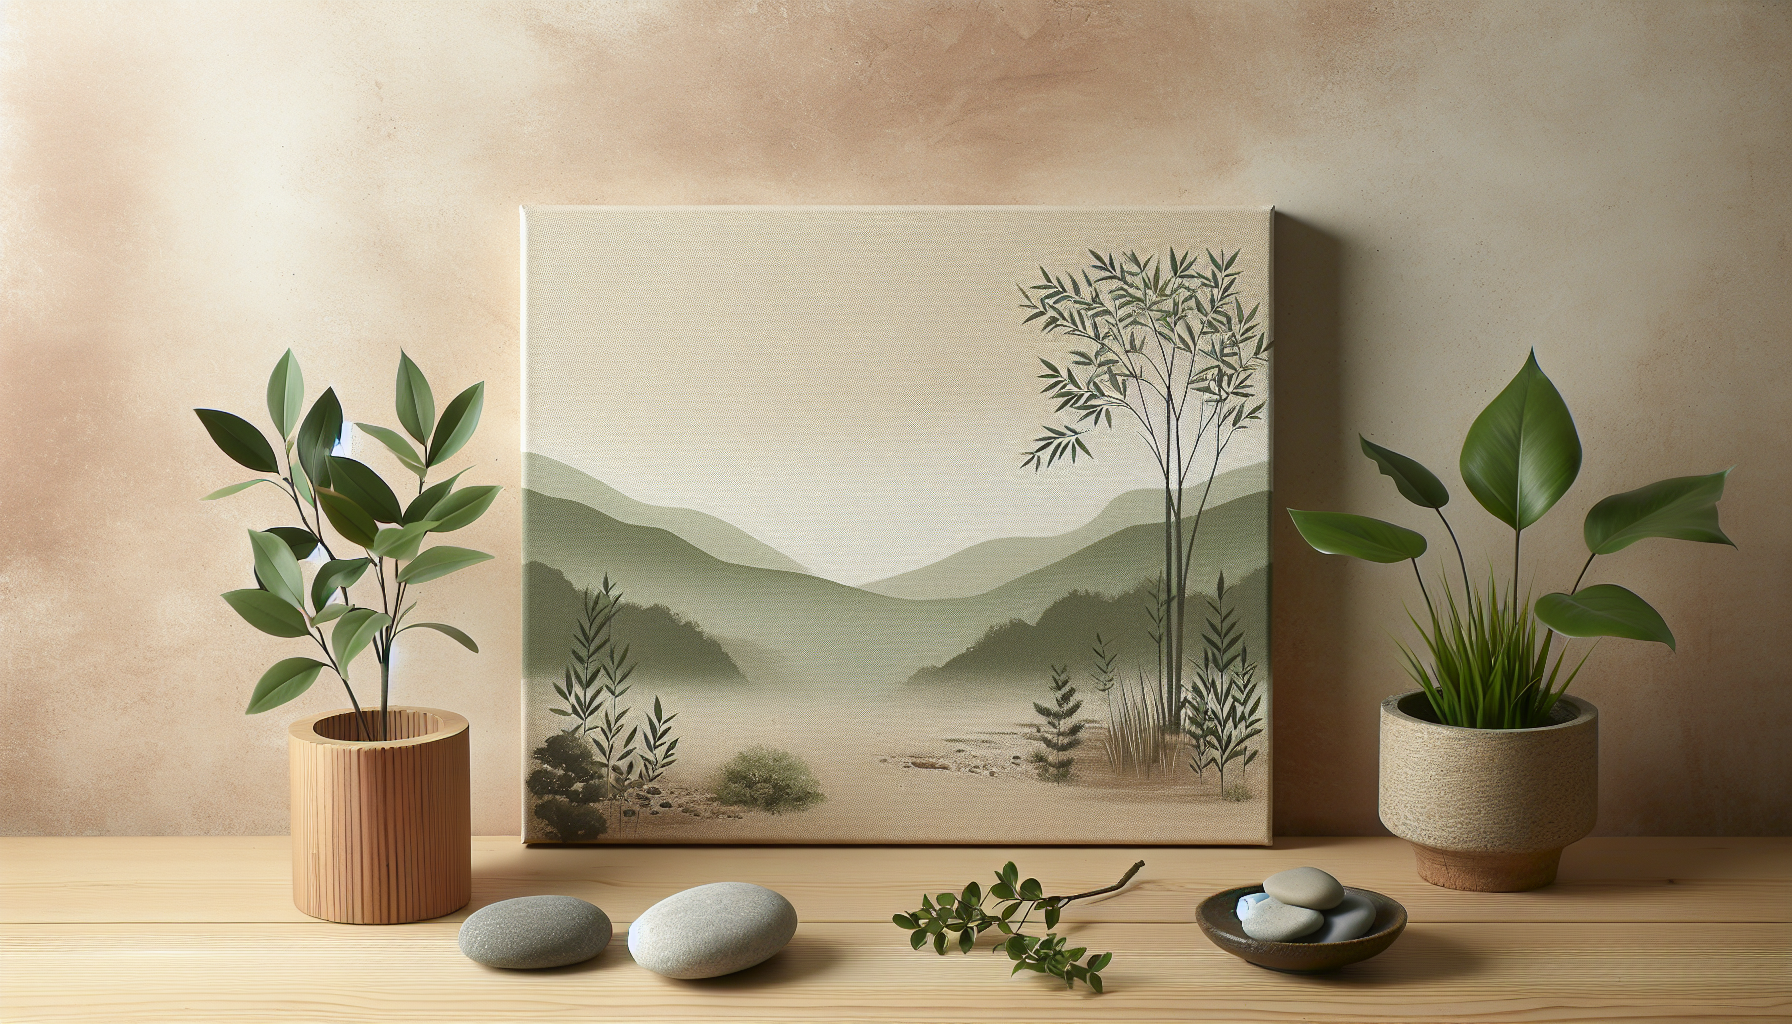
1. Nature-inspired Canvas Art
Painting a simple canvas can be a straightforward and fulfilling project.
Materials Needed:
- A blank canvas
- Acrylic paint in natural colors (greens, browns, whites)
- Brushes
- Water
Instructions:
- Choose a Theme: Consider nature as your theme. It could be mountains, trees, or a tranquil landscape.
- Sketch Lightly: Use a pencil to draw your design on the canvas.
- Paint: Start painting using broad strokes for the background and finer brushes for details. Keep your colors muted.
- Let it Dry: Once complete, allow the canvas to dry thoroughly before hanging.
The result will be a serene piece that complements the Japandi ethos.
2. Woven Wall Hangings
Textile art adds warmth to your space, making woven wall hangings a great option.
Materials Needed:
- Natural fibers (cotton, jute)
- A stick or wooden dowel
- Scissors
- Yarn or twine
Instructions:
- Cut Your Fibers: Cut lengths of your chosen material—you can vary the lengths for visual interest.
- Attach to the Dowel: Use your yarn or twine to tie the fibers to the stick, leaving space in between for an airy look.
- Hang: Once complete, hang your woven piece on the wall, letting the natural fibers speak for themselves.
This project not only adds texture but also highlights the organic aspects of Japandi style.
3. Framed Botanical Prints
Bringing in elements of nature through framed prints can evoke a sense of calm.
Materials Needed:
- Pressed flowers or leaves
- Frame(s)
- Watercolor paper or thick cardstock
- Adhesive (glue or tape)
Instructions:
- Collect Specimens: Gather leaves or flowers from your garden or nature walks, and press them.
- Arrange: Arrange the pressed items on the paper in a pleasing layout.
- Adhere: Use adhesive to attach them to the paper.
- Frame: Place the finished piece in a frame, ready to display.
These natural elements can enhance the tranquil feel of your room while staying true to the Japandi aesthetic.
4. Minimalist Line Art
Creating simple line art is a great way to embody Japandi’s minimalist vibe.
Materials Needed:
- Drawing paper
- Fine-tip pens or markers
- Ruler (optional)
Instructions:
- Design: Think about simple, flowing shapes or abstract forms that resonate with you.
- Sketch and Outline: Use a pencil for a light sketch before going over it with your pen.
- Frame: Select a simple frame that complements your artwork without distracting from it.
Minimalist line art captures the essence of simplicity while also allowing your personal style to shine through.
5. Clay Wall Sculptures
Making wall sculptures from clay can add depth to your decor.
Materials Needed:
- Air-dry clay
- Sculpting tools
- Paint (optional)
Instructions:
- Shape the Clay: Using your hands or tools, create abstract shapes or even natural forms like leaves.
- Dry: Allow the shapes to dry completely.
- Paint: If desired, paint the sculptures using muted colors that align with the Japandi palette.
- Mounting: Use adhesive to attach the sculptures directly to the wall or frame them.
These unique, handmade pieces bring a tactile element to your walls that resonates with the Japandi spirit.
Tips for Creating Japandi Wall Art
Creating wall art can be a rewarding process. Here are a few tips to help you achieve the best results:
1. Keep It Simple
Less is often more in Japandi design. Focus on clean lines and basic shapes. Overly complex designs can clutter the aesthetic.
2. Use Earthy Tones
When selecting colors, stick to a palette that feels organic. Think about the gentle hues found in nature—muted greens, soft browns, and creams.
3. Embrace Natural Materials
Utilizing natural materials will help you stay true to the spirit of Japandi design. Materials like wood, clay, and fiber connect your artwork to the beauty of the natural world.
4. Consider Scale and Placement
Before hanging or displaying your art, think about scale and where it fits best. Larger pieces can act as focal points, while smaller works can be grouped for a collective visual impact.
How to Style your Japandi Wall Art
Once you’ve created your wall art, arranging it thoughtfully can make a significant difference in the overall ambiance of your space. Here are some strategies for styling:
1. Gallery Wall
A gallery wall featuring a mix of your creations can create an interesting visual story. Use frames of similar colors or materials for a cohesive look.
2. Balance and Symmetry
Japandi style often favors balance. Consider symmetrical arrangements for a neatly organized appearance that promotes peace and tranquility.
3. Incorporate Shelves
Floating shelves can help display smaller pieces of art along with plants or decorative items, enhancing the overall aesthetic without overwhelming the wall.
4. Use Natural Light
If possible, determine a position where your art will catch the light. Natural lighting can enhance the colors and textures, making your art even more striking.
Maintaining Your Japandi Wall Art
Once your wall art is displayed, you want it to last. Here are some practical tips for maintenance:
1. Dust Regularly
Keep your art looking fresh and vibrant by lightly dusting it regularly. A soft duster or cloth works best.
2. Protect from Direct Sunlight
Direct sunlight can fade colors over time. If your art is sensitive to light, consider placing it out of direct sunlight or using UV protective glass for framed pieces.
3. Check for Damage
Periodically inspect your wall art for signs of damage or wear. Repaint or fix any issues to maintain that clean look characteristic of Japandi design.
4. Refreshing Your Art
As seasons change or your style evolves, consider refreshing your wall art. Changing out pieces for new ones can keep your space feeling fresh and exciting.
Final Thoughts
Creating your own Japandi-style wall art not only enhances your home’s aesthetic but also fosters a sense of mindfulness and creativity. Each piece crafted with intention brings you one step closer to achieving a harmonious space. Remember, the beauty of Japandi lies in its simplicity and connection to nature—let these principles guide your DIY projects.
With the right materials and inspiration, your walls can reflect the calmness, functionality, and beauty that the Japandi style offers. Embrace the process, and enjoy every moment of crafting your unique pieces of art!